At Plunge Pools Adelaide, we guide homeowners through this entire journey. From checking council rules and Adelaide’s clay soil conditions to crane lifting the pool into place and getting it certified, our team manages every stage so nothing is missed and nothing goes wrong. We don’t just install pools, we make sure they are safe, legal, and built to last in South Australian conditions.
In this guide, you will learn exactly how a plunge pool is installed, how long it takes, what it costs, what can go wrong, and how to avoid common mistakes. By the end, you will know whether your Adelaide property is suitable and how to get started with a clear plan and no guesswork.
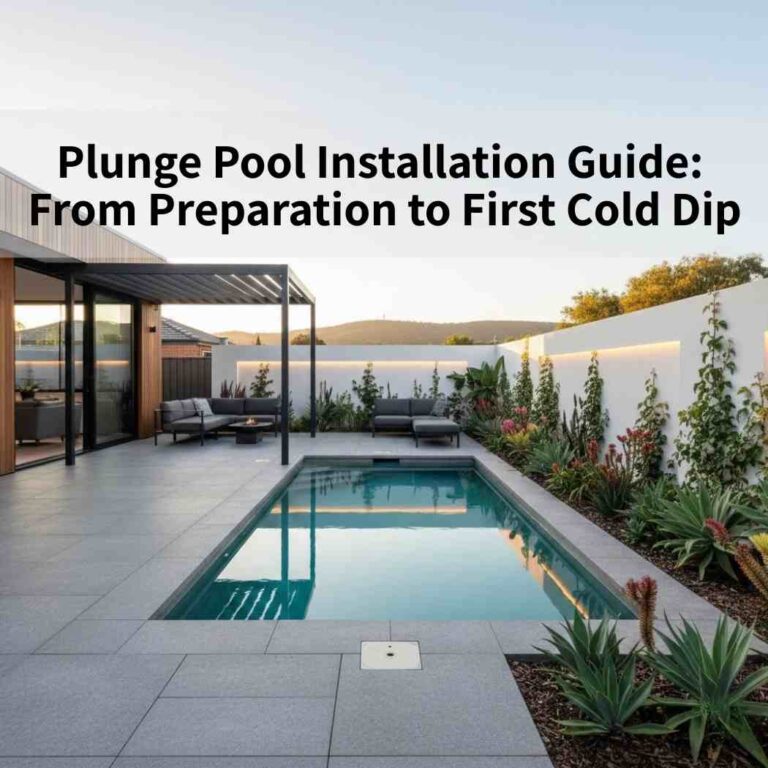
What Is a Plunge Pool Installation?

A plunge pool installation is everything that happens between choosing a small backyard pool and taking your first cold dip. It includes delivering the pool shell, preparing the ground, lowering the pool into place, connecting plumbing and electrical systems, installing fencing, and obtaining council approval to ensure the pool is safe and compliant.
Plunge pools are ideal for small yards, courtyards, or townhouses in Adelaide. They are made for cooling off, not long swims, usually 2–6 metres long and deeper than wide.
Pool Type Comparison
| Pool Type | Build Time | Cost | Notes |
|---|---|---|---|
| Precast concrete | 3–6 weeks | $$ | Factory-made, strong, fast install |
| Poured concrete | 8–16 weeks | $$$ | Built on site, longer cure time |
| Fibreglass | 4–8 weeks | $$ | One-piece shell, needs wide access |
| Stock tank | 1–2 weeks | $ | DIY, not council-approved |
A precast plunge pool gives you a clean look, short build time, and less yard mess, ideal for Adelaide homes.
How a Plunge Pool Works
A plunge pool works by circulating water through a filtration system, holding that water inside a reinforced concrete or fibreglass shell, and using a heater or chiller to control temperature. These three systems work together to keep the water clean, safe, and ready to use all year round.
1. Filtration loop – how the water stays clean
Every plunge pool uses a closed-loop circulation system.
This works like this:
Water is pulled from the pool through:
- A skimmer box (surface water, leaves, oils)
- A main drain (heavy particles at the bottom)
- The water flows into a pump
- The pump pushes it through a filter (usually a cartridge or sand)
- Clean water is sent back into the pool through return jets
This cycle repeats many times per day.
Because plunge pools are small, the entire water volume is filtered multiple times every day, which means:
- Less chemical use
- Clearer water
- Faster heating and cooling
- Lower running costs than full-size pools
This is why small backyard plunge pools are easier to maintain than large swimming pools.
2. Shell strength – what actually holds the water
The pool shell is what keeps everything in place. It must hold:
- The weight of the water
- The pressure of the surrounding soil
- Ground movement from clay, sand, or reactive soils
Precast concrete plunge pools use:
- Steel reinforcement inside the walls and floor
- Thick concrete panels cured in a factory
- Structural ribs that stop cracking and flexing
This creates a rigid, waterproof vessel that:
- Resists soil movement
- Handles Adelaide’s temperature swings
- Lasts for decades without leaking
Fibreglass and poly shells work differently, using flexible materials instead of steel, but all plunge pools rely on their shell to stop water loss and structural failure.
This is why soil testing and base preparation are critical before installation — the shell is only as strong as what it sits on.
3. Heating and cooling – how the water stays usable
Because plunge pools have less water than full-size pools, they are much easier to control.
Most use:
- Electric heat pumps
- Or electric chillers
- Or a combined heating & cooling unit
These systems work like an air conditioner:
- They pull heat from the air
- Transfer it into or out of the water
- Use far less electricity than direct heaters
You can also add:
- Solar heating to reduce power use
- Insulated pool covers to stop heat loss overnight
This allows plunge pools to be used for:
- Cold therapy
- Recovery and wellness
- Heated winter swimming
- Year-round backyard use
Which is why plunge pools are popular in Adelaide’s changing climate, where winter nights are cold, and summers are hot.
How Long Does a Plunge Pool Installation Take?
A plunge pool in Adelaide takes about 3–8 weeks from approval to your first swim.
Flat sites are faster; steep or clay sites take longer.
Typical Timeline
| Stage | Time Needed |
|---|---|
| Approvals & planning | 1–2 weeks |
| Site prep & excavation | 1 week |
| Delivery & crane lift | 1 day |
| Plumbing & electrical | 1 week |
| Fencing & certification | 1–2 weeks |
Delays often come from council approvals, crane bookings, or wet weather — not from the pool shell.
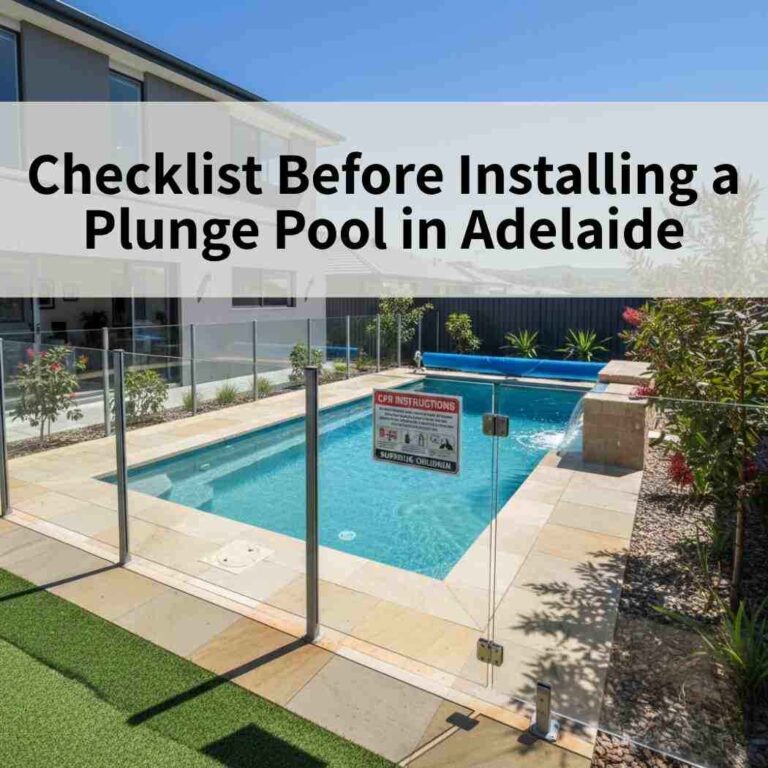
What Needs to Be Done Before You Order a Plunge Pool
Before you order a plunge pool, you must check council rules, locate underground services, confirm safety fencing requirements, and complete a soil test so your pool can be installed legally, safely, and without future movement or damage.
Follow these steps before buying a plunge pool:
1. Council Approval & BYDA (Dial Before You Dig)
Every plunge pool installation in Adelaide must comply with local council and state planning laws.
You need to confirm:
- Whether a development approval is required
- Setbacks from fences, boundaries, and buildings
- Where sewer, stormwater, gas, NBN, and power lines run underground
A BYDA search shows where underground services are located, so the excavator doesn’t hit:
- Gas lines
- Water mains
- Electrical conduits
- Sewer or stormwater pipes
Hitting a service line can shut down your street, cause massive repair bills, and delay your plunge pool installation by weeks.
2. Pool Fence & Safety Compliance
South Australian law requires every plunge pool to have:
- A 1.2-metre-high safety fence
- A self-closing, self-latching gate
- A visible CPR safety sign
This applies to:
- Inground plunge pools
- Above-ground plunge pools
- Courtyard and small backyard plunge pools
You must allow room for:
- Fence footings
- Gate swing clearance
- Compliance inspection access
If fencing is forgotten or non-compliant, the council can:
- Issue fines
- Refuse certification
- Force expensive rework
3. Soil Test (The Most Skipped Step)
Adelaide has some of the most reactive clay soils in Australia.
A geotechnical soil test tells your installer:
- How much the ground expands and contracts
- If special footings or drainage are needed
- Whether the pool shell needs extra structural support
Without a soil test:
- The pool can sink
- Plumbing can crack
- The shell can twist or move
This is one of the main causes of warranty disputes and long-term structural failure.
4. Professional Site & Permit Management
A licensed plunge pool installer, like Plunge Pools Adelaide, handles:
- Council paperwork
- Engineering
- Soil test coordination
- Compliance with safety laws
- Setback and drainage rules
This protects you from:
- Illegal installations
- Failed inspections
- Insurance and warranty issues
- Costly redesigns after the pool is ordered
Once a precast plunge pool is manufactured, it cannot be resized.
If site checks weren’t done properly, you could be stuck with a pool that doesn’t legally fit your property.
Skipping these steps can cause fines, leaks, or pool movement later.
Why These Checks Matter
Skipping these steps can lead to:
- Council fines
- Failed safety certification
- Pool movement
- Cracked plumbing
- Voided warranties
- Thousands in re-excavation and repairs
Doing it right before ordering your plunge pool means:
- Faster installation
- Zero legal risk
- A stable base
- A pool that lasts decades
How Do You Choose the Right Spot for a Plunge Pool?
The right spot for a plunge pool is a flat, well-drained area with clear crane access, nearby power, and no large tree roots or underground services.
Here is how to choose the best plunge pool location for safety, cost, and long-term performance.
Crane Access Matters More Than Most People Realise
Precast concrete and fibreglass plunge pools are delivered as one solid shell. That means a crane must lift the pool over fences, roofs, or garages and place it directly into the hole.
Your chosen spot must:
- Allow a crane to get close enough to the site
- Have a clear lift path with no powerlines, trees, or buildings in the way
- Support the weight of the heavy crane outriggers
Poor crane access increases installation costs and can even make some parts of your yard impossible to use.
Drainage Protects the Pool and Your Home
Water should always flow away from the plunge pool, not toward it. If rainwater runs into the excavation, it can:
- Build pressure behind the shell
- Wash away the base material
- Cause the pool to shift or crack
The best plunge pool locations sit on slightly higher ground with natural drainage that directs water away.
In Adelaide and across South Australia, poor drainage combined with reactive clay is one of the biggest causes of plunge pool movement.
Power Supply Needs to Be Close
Plunge pool pumps, filters, and heat pumps all need electrical power. The closer your pool is to an existing power supply:
- The cheaper the electrical work
- The faster the installation
- The fewer trenches cut through your yard
Placing the pool too far from power can add thousands in electrical and conduit work.
Trees Create Hidden Long-Term Damage
Large trees may look nice, but their roots can crack plumbing, shift bases, and damage pool shells. Leaves and debris also clog filters and increase maintenance.
Avoid placing your plunge pool:
- Near large gum trees or figs
- Under heavy leaf drop
- Above known root zones
Slopes Increase Engineering and Cost
Installing a plunge pool on sloping ground requires:
- Retaining walls
- Engineered footings
- Drainage systems
- Extra excavation
Flat ground is always:
- Faster to install
- Cheaper to build
- More stable over time
That is why professional installers always look for the flattest part of the yard first.
Why Flat, Dry, and Accessible Always Wins
The best plunge pool locations share three things:
- Flat ground
- Good drainage
- Easy crane access
This combination reduces:
- Installation time
- Engineering costs
- Risk of cracking or movement
It also ensures your plunge pool stays level, safe, and structurally sound for decades.
How Do Soil, Drainage, and Base Engineering Keep a Plunge Pool Strong?
Your pool’s base keeps it strong for decades. Clay soils expand and shrink with rain, while sandy soils drain faster. A reinforced concrete slab spreads the pool’s weight evenly and stops sinking. Soil testing and proper slab design prevent cracks, movement, and long-term damage.
How Crack Prevention Is Built Into the Design
Cracks don’t come from bad concrete — they come from uneven movement.
Crack prevention starts with:
- Soil testing to understand how the ground behaves
- Correct slab engineering to match that soil
- Proper drainage to stop moisture changes
Together, these prevent:
- Differential settlement
- Slab bending
- Wall stress inside the pool shell
This is why professional installers don’t skip steps; they engineer the base to match your exact block conditions.
What Happens During Excavation and Site Preparation for a Plunge Pool?
This is when your yard starts to change.
Mark & Dig: The hole is set out and excavated slightly wider than the plunge pool shell.
Over-Excavate: Weak topsoil is removed and replaced with compacted gravel.
Drainage Layer: Gravel and drainage pipes are installed so groundwater can escape.
A level, dry base is the secret to a stable pool.
Crane Delivery & Installation
Crane delivery and installation is the fastest, cleanest, and safest way to place a precast concrete or fibreglass plunge pool into your backyard. Instead of weeks of noisy on-site building, your plunge pool arrives fully manufactured, fully cured, and ready to be lifted straight into position by a mobile crane in a single day.
This method is now the preferred way to install plunge pools in tight urban blocks, sloping sites, and small courtyards across Australia because it delivers better structural accuracy, less disruption, and fewer construction risks.
Safety steps:
- Check powerlines and trees
- Clear the lift area
- Guide the pool in
- Level and secure it
This fast, clean method avoids weeks of messy on-site building.
Plumbing, Filtration & Electrical
Once your plunge pool shell has been craned into place, the most important stage begins: connecting the plumbing, filtration, and electrical systems that make the pool actually work. This is where a plunge pool changes from a concrete shell into a clean, safe, temperature-controlled swimming environment.
Modern precast concrete and fibreglass plunge pools are built with factory-installed pipes, skimmer boxes, return jets, and main drains already moulded into the shell. These internal water pathways are pressure-tested at the factory, so they are watertight before the pool ever arrives at your home.
What happens on site is the final connection of these internal systems to the external equipment that keeps the water clean, clear, and safe.
Backfilling & Stabilisation
Backfilling and stabilisation are one of the most critical and most misunderstood stages of a plunge pool installation. This is the step that locks the pool into the ground, prevents movement, and protects the shell from cracking, leaking, or lifting during heavy rain.
Even the strongest precast concrete or fibreglass plunge pool can fail if the surrounding soil is not placed and drained correctly. That’s why professional installers treat this phase with the same level of care as the concrete base and crane lift.
Pool Surrounds & Landscaping
Finish the pool area with coping, decking, and retaining walls. Coping protects the edge; decking adds safety and style. Plan plants and lighting early to keep roots and water away from the shell.
Design Inspirations
A small backyard doesn’t mean you have to compromise on style, comfort, or luxury. In fact, plunge pools are designed specifically for compact Adelaide courtyards, narrow side yards, and inner-city blocks, making them one of the best ways to add value and lifestyle appeal to limited outdoor spaces.
With the right design, a plunge pool can become the visual centrepiece of your yard, not just a place to cool off, but a true outdoor retreat.
Compact Courtyard Plunge Pool Designs
Many Adelaide homes, especially in suburbs with smaller blocks, have tight outdoor areas surrounded by fences, walls, and neighbouring houses. Slimline plunge pools are perfect for these spaces because they can be:
- Built long and narrow
- Placed along a boundary wall
- Fitted between buildings
- Installed in L-shaped or corner layouts
These courtyard plunge pool designs maximise swimming space without eating up the entire yard. When paired with built-in bench seating or step entries, even a small pool can feel open and inviting.
Spa-Style Plunge Pools for Year-Round Use
Modern plunge pools aren’t just for summer. Many homeowners now choose spa-style plunge pool setups that allow the pool to be used all year round:
- Relaxation
- Recovery and hydrotherapy
- Entertaining
- Winter soaking
You can add:
- Hydrotherapy jets for massage
- Electric heating or heat pumps for warm water
- Chillers for cold plunge therapy
- LED lighting for night-time ambience
This turns a simple plunge pool into a compact backyard spa and swimming pool in one, making it one of the most versatile pool designs for Adelaide homes.
Luxury Finishes for a High-End Look
Even small plunge pools can look like something from a resort when the right finishes are used. Some of the most popular luxury design features include:
Stone and Tile Surrounds
Natural stone, porcelain pavers, or mosaic tiles add texture and contrast, helping the pool stand out as a feature instead of blending into the yard.
Timber Decking
Timber or composite decking creates warmth and a seamless transition from house to pool. It also works beautifully in tight courtyards where space is limited.
Glass Pool Fencing
Glass fencing keeps the space feeling open while still meeting Adelaide pool safety regulations. It allows you to see the water from inside the house and makes small yards feel larger.
Built-In Seating and Ledges
Bench seats, entry steps, and ledges make the pool more comfortable and social — perfect for relaxing with friends or supervising kids.
Fencing & Certification
Before you swim, your pool must pass safety checks.
- Fence height: At least 1.2 metres
- Gate: Self-closing and latching
- Signs: CPR chart visible
A licensed inspector checks everything. Once passed, you get your safety certificate.
Filling & First Startup
After certification, fill the pool with a hose or water truck.
Quick Start Steps
| Step | Task | Time |
|---|---|---|
| 1 | Fill with water | 4–6 hours |
| 2 | Balance pH & chlorine | 1 hour |
| 3 | Run filter & check leaks | 4 hours |
Water should be clear and safe before your first swim.
Pool Type Comparison
| Type | Strength | Maintenance | Look | Lifespan |
|---|---|---|---|---|
| Precast concrete | ⭐⭐⭐⭐ | Low | Premium | 25+ yrs |
| Poured concrete | ⭐⭐⭐ | Medium | Premium | 20+ yrs |
| Fibreglass | ⭐⭐ | Low | Smooth | 10–15 yrs |
| Modular steel | ⭐ | High | Basic | 5–10 yrs |
DIY vs Professional
At first glance, a DIY plunge pool can look like a cheap and fast way to add a pool to your backyard. But in Australia, especially in places like Adelaide with reactive clay soils, strict pool laws, and high insurance requirements, DIY installations carry serious financial and safety risks.
A professionally installed plunge pool may cost more upfront, but it protects your home, your family, and your long-term investment.
Let’s compare both options in real-world terms.
What Does a DIY Plunge Pool Actually Mean?
A DIY plunge pool usually involves:
- Buying a fibreglass, poly, or steel shell
- Hiring your own excavator
- Preparing the base yourself
- Installing plumbing and electrical connections
- Backfilling the pool
- Organising fencing and compliance
This means you become the project manager, engineer, and legal compliance officer without the licences or insurance required by Australian law.
The Real Risks of DIY Plunge Pools
1. Insurance Is Automatically Voided
In Australia, home insurance and pool warranties require licensed tradespeople.
If you:
- Install plumbing yourself
- Wire pumps or heaters
- Pour or prepare the slab
- Connect drainage
…your insurer can legally refuse to cover:
- Pool leaks
- Structural cracks
- Electrical faults
- Flood damage
- Injury or drowning claims
Even one unlicensed step can void coverage.
This means if your pool leaks into your house or collapses in heavy rain, you pay 100% of the repair cost.
2. Council Fines and Stop-Work Orders
Every plunge pool in Australia must comply with:
- Development approvals
- Safety fencing rules
- Setbacks from boundaries
- Stormwater drainage laws
- Electrical safety certificates
- Pool barrier inspections
- CPR signage
DIY installers frequently:
- Skip permits
- Guess setback distances
- Install fencing incorrectly
- Forget inspections
Councils can:
- Issue fines
- Order demolition
- Refuse occupancy certificates
- Block you from selling the home
Many DIY pools become illegal structures that must be fixed or removed at resale.
3. Soil, Drainage & Structural Failure
This is where most DIY pools fail.
Without professional engineering:
- Clay soil expands and cracks the shell
- Poor drainage traps groundwater
- Backfill pressure bends the pool walls
- The pool can lift, sink, or split
Plunge pools weigh over 10 tonnes when full.
Without a properly engineered base and drainage system, gravity always wins.
Leaks and shell movement often appear 6–18 months later, long after any DIY warranty is gone.
4. Electrical and Water Safety Risks
DIY pool electrics are one of the most dangerous home projects.
Incorrect:
- Earthing
- Bonding
- RCD protection
- Cable depth
- Pump wiring
…can lead to:
- Electric shock
- Fire
- Pump failure
- Fatal accidents
This is why Australian law requires licensed electricians for pool equipment — no exceptions.
What a Professional Plunge Pool Installer Actually Provides
When you hire a licensed company like Plunge Pools Adelaide, you’re not just buying a pool; you’re buying risk removal.
Professional installation includes:
✔ Council Approvals & BYDA Checks
- Planning permission
- Utility location
- Legal setbacks
- Stormwater compliance
✔ Soil Testing & Base Engineering
- Clay or sand identification
- Compacted gravel beds
- Reinforced concrete slabs
- Hydrostatic drainage
✔ Crane & Delivery Management
- Lift planning
- Access checks
- Neighbour protection
- One-day shell placement
✔ Licensed Plumbing & Electrical
- Pump and filter plumbing
- Heater connections
- Drainage compliance
- Electrical certificates
✔ Backfilling & Structural Protection
- Balanced water filling
- Gravel pressure control
- Groundwater relief
- Shell stability
✔ Pool Fencing & Final Certification
- Legal fencing
- Self-closing gates
- CPR signage
- Safety inspection sign-off
Your pool becomes:
- Legal
- Insured
- Safe
- Warranted
- Ready to use
Which Is Really Cheaper?
DIY looks cheaper until something goes wrong.
| Cost Area | DIY Pool | Professional Pool |
|---|---|---|
| Base failure | $5,000 – $25,000 | Covered |
| Leaks | $3,000 – $15,000 | Covered |
| Council fines | $1,000 – $10,000 | Avoided |
| Insurance claims | Rejected | Approved |
| Resale issues | Yes | No |
| Stress & delays | High | Low |
One mistake can cost more than the entire professional installation.
Final Verdict: DIY vs Professional Plunge Pool Installation
A DIY plunge pool is not a cheaper option; it is a high-risk gamble.
A professional installer like Plunge Pools Adelaide gives you:
- A legal pool
- A structurally stable pool
- An insured pool
- A safe family environment
- A pool that adds real property value
If you want a plunge pool that lasts for decades, doesn’t crack, and won’t cause insurance nightmares, professional installation isn’t optional — it’s essential.
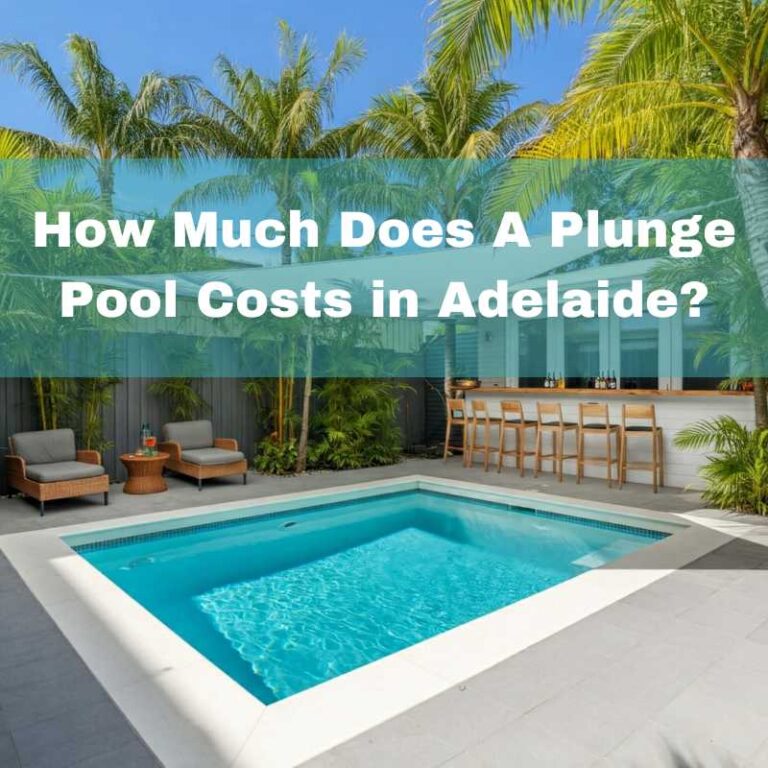
How Much Does a Plunge Pool Installation Cost?
Most Adelaide plunge pools cost $25,000–$60,000 installed and certified.
| Cost Item | Typical Range (Adelaide) |
|---|---|
| Pool shell | $10,000 – $25,000 |
| Excavation & base | $3,000 – $7,000 |
| Crane & delivery | $2,000 – $5,000 |
| Plumbing & electrical | $4,000 – $8,000 |
| Fencing & certification | $2,000 – $5,000 |
Cheap installs often skip soil testing or drainage — these fail fast and cost more later.
How to Choose the Right Installer or Supplier
Check these before you sign:
- Licence & Insurance
- Warranty Details
- Full Inclusions (approvals, crane, fencing, plumbing)
- Clear Contract (delays, extra costs)
These four checks protect you from hidden costs, legal problems, and poor workmanship, especially when installing a precast concrete or fibreglass plunge pool in Australia.
When Can You Swim?
Once installed and certified, your plunge pool can be ready to swim in within 7–14 days.
Because precast concrete plunge pool shells are already fully cured, there is no long structural waiting time as you get with poured-in-place concrete pools.
What to Expect from Your First Cold Plunge
Cold water gives a full-body refresh. A typical plunge is kept between 10–15°C, and beginners should start with 30 seconds to 2 minutes. Breathe slowly, exit safely, and warm up after. Most people feel alert, calm, and energised, especially refreshing after a hot Adelaide day.
You’ll feel alert, calm, and energised after a hot Adelaide day.
Conclusion
A plunge pool is a smart choice for many Adelaide homes, especially if you have a small yard, a sloping block, or limited access. When installed the right way, it gives you cooling, relaxation, and value without the long build time or high cost of a full-size swimming pool.
The best way to know if your property is suitable is to have it checked. Yard size, soil type, drainage, access for a crane, and council rules all affect what is possible. A proper site inspection removes guesswork and helps avoid costly mistakes.
At Plunge Pools Adelaide, we offer full service from start to finish. We handle the approvals, soil checks, delivery, installation, and safety certification so you don’t have to. Our team works with Adelaide homeowners every day to create plunge pools that are safe, strong, and built to last.
If you’re ready to explore your options, request a quote from Plunge Pools Adelaide today. We’ll inspect your site, explain your choices, and give you clear pricing with no surprises.
Your first cold dip starts with the right plan — and we’re here to help you get there.
FAQs
1. Will a plunge pool fit in my Adelaide backyard?
Yes, a plunge pool can fit in most Adelaide backyards, even small or narrow ones. Plunge pools are designed for tight spaces and can be crane-lifted over homes and fences, making them ideal for courtyards, townhouses, and compact suburban blocks.
2. How much does a full plunge pool installation cost in Adelaide?
A full plunge pool installation in Adelaide usually costs between $25,000 and $60,000.
This includes the pool shell, excavation, crane hire, plumbing, electrical work, fencing, and approvals, depending on access, soil type, and the features you choose.
3. How long does it take before I can swim?
Most Adelaide plunge pools are ready to swim in within 7 to 14 days after installation.
Because the shell is factory-cured, once it is placed, connected, filled, and certified, water balancing is all that is needed before your first dip.
4. What can go wrong during a plunge pool installation?
The most common plunge pool problems are cracking, movement, leaks, and failed approvals. These happen when soil testing, drainage, engineering, or licensed installation is skipped, which is why professional planning and compliance are critical in Adelaide.
5. Do I need council approval and fencing for a plunge pool in South Australia?
Yes, every plunge pool in South Australia requires council approval and compliant safety fencing. Your pool must meet setback, barrier, and gate laws before it can be filled, or you risk fines and being forced to remove or modify the pool.